Editing
Controls and Courses
In Catching Features,
controls that you see in the terrain and the control rings you see as courses
on the map are two completely different mechanisms. This gives a flexible approach
to course making (you can use any control sticks of any shape in the terrain),
but can also lead to problems (when the control ring isn't centered exactly
on the control stick).
Courses and control
sticks are stored in different files. The control sticks are usually stored
in the map file, so to save them use File/Save Map. (Control sticks can
also be stored in object files, but I'll not go into that here.)
Courses are stored
in an separate object file, which are loaded with File/Open Object File...
(the default course file is usually located in the events/yourmapname/day1
subfolder to your map's folder). Save the course file with File/Save Courses.
If the course should be uploaded as a competition, make sure to also use File/Save
Object File while the course file is loaded (otherwise there might be an
error during upload.)
In the sections
below, the control object the runner see in the terrain is referred to as the
control stick. The control seen on the map is referred to as the control
ring.
Preparing a
control texture
If you have converted
an OCAD map and added the control sticks to the terrain (and your course mainly
takes place in the woods), you also first place a version of control.jpg
in your map's folder. Also do the following in CF Edit:
1. Press the F3 key to open the texture list. (If control.jpg
is not listed in the texture list, close the texture list and add the file it
to the list by using File/Insert Texture... After that, repeat step #1.)
2. Press the Select None button
3. Select the line in the list that says control.jpg
4. Click on the Properties button
5. Check both the IsShadowed and 1/3 View Dist check boxes. (The
1/3 View Dist is very important to use for controls, otherwise the controls
will be too easy to detect in the woods.)
6. Click OK button
7. Select All button
8. Close the texture list and save the map
Place a control
stick
1. First, make
sure that the file control.jpg is copied to your map's main folder (make
a copy from the CatchingFeatures/maps folder)
2. In CF Edit, make sure that you see the map in 2D view
3. Zoom in on the area where you want to place the control (use the mouse scroll
wheel to zoom)
4. Hold down the Shift key and right-click with the mouse at the
location where the control should be placed
5. Select File/Import 3DS...
6. In the dialog box that now appears, select controlstick.3ds and press
the Open button
7. If you have an old version of CF Edit, one more dialog box appears where
the texture should be selected. Here select control.jpg.
8. Now the control should appear in the terrain and the should say top left
corner of CF Edit "48 pts selected". Switch to 3D view by pressing
the Space key. Press the down arrow key to move backwards in the
terrain. Make sure that the control appears in a good spot (not in a tree for
example). If you need to move it, look at the Move a control stick
section below
9. Select Edit/Shade Selected Pts to shade the control stick
10. Press the q key to make the control stick in to a texture region
(this will improve the game speed)
Place/Add a
control ring
1. Make sure to
be in 2D view
2. Select Courses/Edit Courses
3. Select Courses/Insert Control
4. Click where the control should be
IMPORTANT! Now it's extremely important that the control point gets perfectly
centered around on the control stick!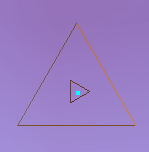
5. Select wireframe mode (for example by pressing F2)
6. Zoom in (use the mouse scroll wheel) on the control so the outline of the
control stick is clearly seen
7. Make sure the control ring's "center dot" appears exactly in the
middle of the control stick (see screenhot). If not, unselect Courses/Lock
Control Locations and move the control ring/center dot.
Select a control
stick
To accurately select
a control stick (if you for example want to move or delete it) do like this.
1. Press F3
to display the texture list window
2. Press the Select None button
3. Select control.jpg in the texture list window (now only control objects
should be visible/selectable on the map)
4. Drag-enclose the control stick (drag a rectangle around it) by using the
left mouse button. In the top left corner of the CF Edit window, it should now
say "48 pts selected"
5. If needed, press F3 to display the texture list again
6. Press the Select All push button (to display all the objects on the map again)
7. Close the texture list window
Move a control
stick
1. Make sure the
control stick is fully selected. If not, see steps above.
2. If you need to move the control sideways in the terrain, press 1 (which is
the same as selecting Edit/Move XZ). Drag the handles to move the control
stick. (Works in both 2D and 3D view.)
3. If you need to move the control up or down on the same stop, press 2 (which
is the same as selecting Edit/Move Y). Drag the handles to move the control
stick. (Works only in 3D view.)
Move a control
ring
1. Select Courses/Edit
Courses
2. Make sure Courses/Lock Control Locations is unselected
3. Be in 2D view
4. Drag the control ring to its new position
5. Select Courses/Lock Control Locations again to avoid any accidental
movements of other controls later on
Delete a control
stick
1. Select the control
stick (see steps above)
2. Select Edit/Delete Selected Tris
Delete a control
ring
1. Select Courses/Edit
Courses
2. Click in the middle of the control ring so it appear with appear with a different
red color than the rest of the control rings
3. Select Course/Delete Current Control
Control descriptions
Every control on
the course should have proper control, so there will be no guesswork on where
to find the control. Unfortunatelly, the random courses created by the Randomizer
in CF will not create fully correct control desccriptions (they don't include
information such as what side of a boulder, which part of the marsh, and so
on), so these control definitions should be corrected if they are going to be
uploaded as a competition.
Do like this to
add a description for a control:
1. Select Courses/Edit Courses
2. Make sure Courses/Lock Control Locations is checked (so you don't
accidentally move the control ring while adding control descriptions)
3. Click in the middle of the control ring so it appear with appear with a different
red color than the rest of the control rings. The grid for the control description
will now appear in the top right corner.
4. Click on a square in the grid to change the square. Make a selection from
the list that appears. To clear a square, select the "empty symbol"
that appears between the selected square and the list.
If you're unsure
about how to use control desciptions, please refer to the IOF document available
at:
http://www.orienteering.org/footo/pictsymb.htm
Create a new
course
1. Select Courses/Edit
Courses
2. Select Courses/Add new course... Give the new course a name.
3. Select a control ring. Select another one to create a leg between the control
rings. Continue until the course is completed. Right-click on a ring to remove
a control ring from the course.
4. Unselect Courses/Edit Courses
Insert a new
control into an existing course
1. Select Courses/Edit
Courses
2. Select the course where you want to make the change from the bottom of the
Courses menu
3. Make sure no control rings are selected
4. Select the control ring before the new control
5. Click on the new control ring to insert the leg into the course