


About Forest Types
A forest in Catching Features is constructed by setting each triangle that's used on the CF map to a forest type and a density. Even open areas have forests so to speak, they just use the density of 0 for the triangles.
You can use any number of forest types in your map to define the different forest regions you need to describe. If you're really ambitious, you can set different types of forests for different parts of the "white" forests, just as it most often would appear in real life.
Forests can be modified equally well on both random-generated and OCAD-imported maps.
Please note that the same kind of tree can appear more than once in a tree type. This can be a convenient way to globally increase the density of the forest.
OCAD and Forest Types
When reading an OCAD file, there are 5 forest types created (numbered 0-4) by default. Below is a list of the vegetation types that are recognized at the OCAD conversion in the Map Editor and what the default conversion is.
Please note: 2 very common vegetation types that are not converted are Gardens/Settlements (527.0) and Cultivated Land (415.0). Make sure to change these to 401.0 before reading the OCAD file into the Map Editor.
Additional info:
* The "normal" (white) forest type is by default set to 0 with a density
of 10
| OCAD Surface type | Default Forest Type | Default Forest Density | Ground Color
Support (in colors.cfg) |
| 211.0 (Open sandy ground) | 0 | 0 | Yes |
| 212.0 (Bare Rock) | 0 | 0 | Yes |
| 310.0 (Marsh) | 1 | 10 | No* |
| 401.0 (Open Land) | 0 | 0 | Yes |
| 402.0 (Open Land with Scattered Trees) | 2 | 3.5 (mix of 3 and 4) | Yes |
| 403.0 (Rough Open Land) | 0 | 0 | Yes |
| 404.0 (Rough Open Land with Scattered Trees) | 2 | 3 | Yes |
| 406.0 (Forest Slow) | 3 | 10 | Yes |
| 407.0 (Undergrowth: Slow running) | 4 | 11 | No |
| 408.0 (Forest Difficult) | 3 | 13 | Yes |
| 409.0 (Undergrowth: Difficult to Run) | 4 | 14 | No |
| 410.0 (Forest Impassible) | 3 | 13 | Yes |
*) While OCAD-imported marshes doesn't have color support in colors.cfg, it's easy to recolor them by changing the colors of the texture layer that appears above the marsh.
Random Maps and Forest Types
Random maps are basically using the same mapping system for forest types as OCAD-imported maps, but only the types 0 through 3 are actually used (open land are forest type 2 with a density of 0 in random maps).
Changing Forest Types
| If you want
to change the forest type globaly accross the map, do like this: 1. Select Edit/Edit Forest Types... 2. Select the forest type you want to change using the list on the left 3. Add or remove trees from the list to the right by using the buttons with arrows on (each tree type can appear more than once if you need to) 4. Select a tree type in the rightmost list and press the Edit Tree Properties button to change the "shape" around the tree and to define if it's a tree or a bush (Solid Collision for trees). This step is especially important if you add a new tree type that didn't exist in the forest before. 5. Press Ok button when you've redesigned your forest 6. Select Edit/Rebuild Forest Quadtree to display the changes in the terrain |
If you want
to change a region of the map to another type of forest (or the density),
do like this: 1. Press F3 to display the texture lists 2. Make sure only the terrain textures (normally the ones named t0000.jpg, t0001.jpg, etc) are selected. Deselect everything else (otherwise you'll get trees growing on top of boulders and other even worse things happening) 3. Select the terrain where you want to make the forest change. Make sure points appearing in lakes/ponds are not selected, otherwise you'll get trees growing in the water. 4. Select Edit/Tri Forest Properties... 5. Enter the new forest type and/or the density and press the Ok button |
Adding single Trees/Bushes
There are 2 methods available to add single trees to the terrain.
Method #1:
1. Create a triangle on the surface of the terrain.
2. Set the forest property for that triange to a a density value of around 15
Method #2 (see
the MIT map for an example):
1. Create a text file called map.trees that should be put in your map's
main folder
2. Each line in that file that starts with # will be ignored
3. For each tree you want to insert, add a line with four parameters separated
by spaces. The first parameter is the tree number in the map.tree file
(first tree that appears in map.tree is 0), the next tree is the x, y,
z coordinates
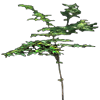
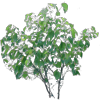
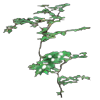
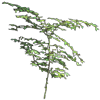
Tree Table
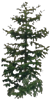
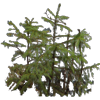
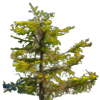
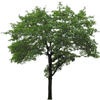
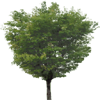
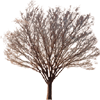
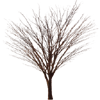
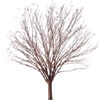
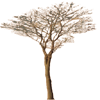
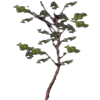
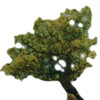
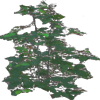
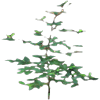
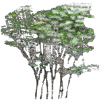
When modifying or building new forests, these are the standard trees and bushes that are included in Catching Features. Please note that the table below doesn't reflect any relative height of the vegetation, all trees and bushes are of the same height in this table.
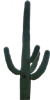
| cactus1.tga | |
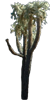
| cactus2.tga | |
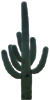
| cactus3.tga | |
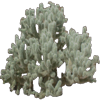
| cactus4.tga | |
| cactusunder1.tga | |
| lolipop.tga | |
| lolipop2.tga | |
| lolipop3.tga | |
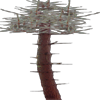
| pine00.tga | |
| pine0.tga | |
| pine1.tga | |
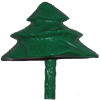
| pine-plastic.tga | |
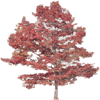
| redtree.tga | |
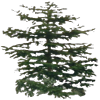
| smallpine0.tga | |
| smallpine0a.tga | |
| smallpine1.tga | |
| smallpine2.tga | |
| tree0.tga | |
| tree1.tga | |
| tree01a.tga | |
| tree2.tga | |
| tree02a.tga | |
| tree3.tga | |
| tree03a.tga | |
| tree04a.tga | |
| tree05a.tga | |
| underbrush0.tga | |
| underbrush1.tga | |
| underbrush2.tga | |
| underbrush3.tga | |
| underbrush4.tga | |
| underbrush5.tga | |
| underbrush6.tga | |
| underbrush7.tga | |
| underbrush8.tga | |